Welcome To Authorify
How To Build Your Book In The Book Builder App
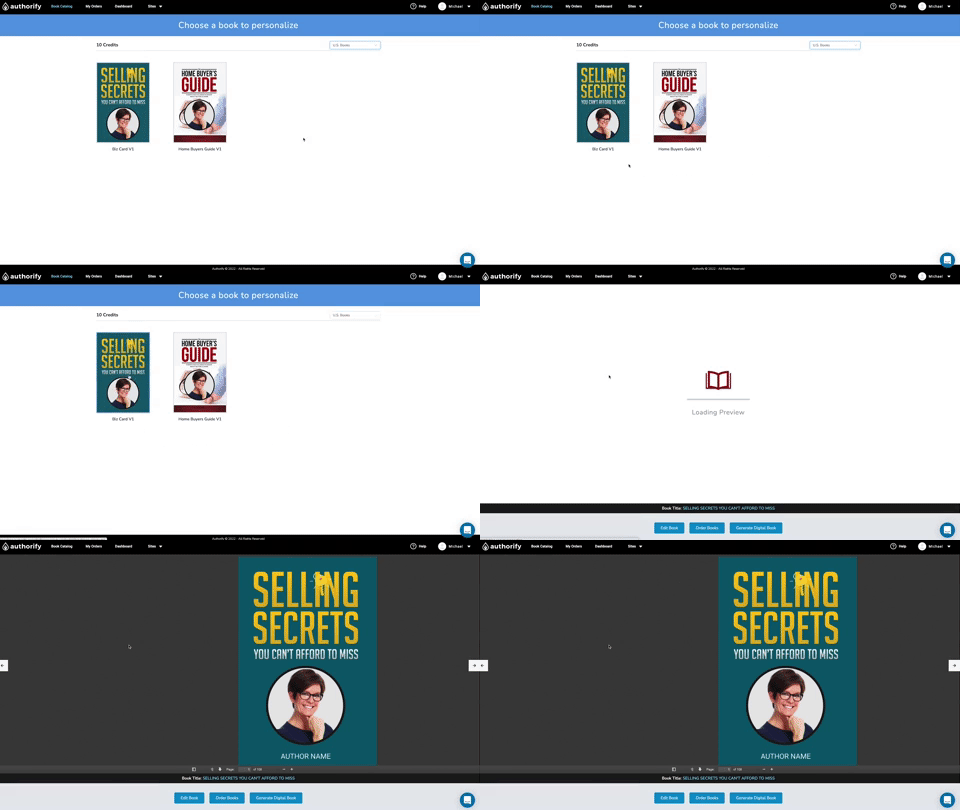
Select the book you want to customize.
From your book catalog, select the niche specific book you would like to create. Once you click on the book image the Book Builder Application will open
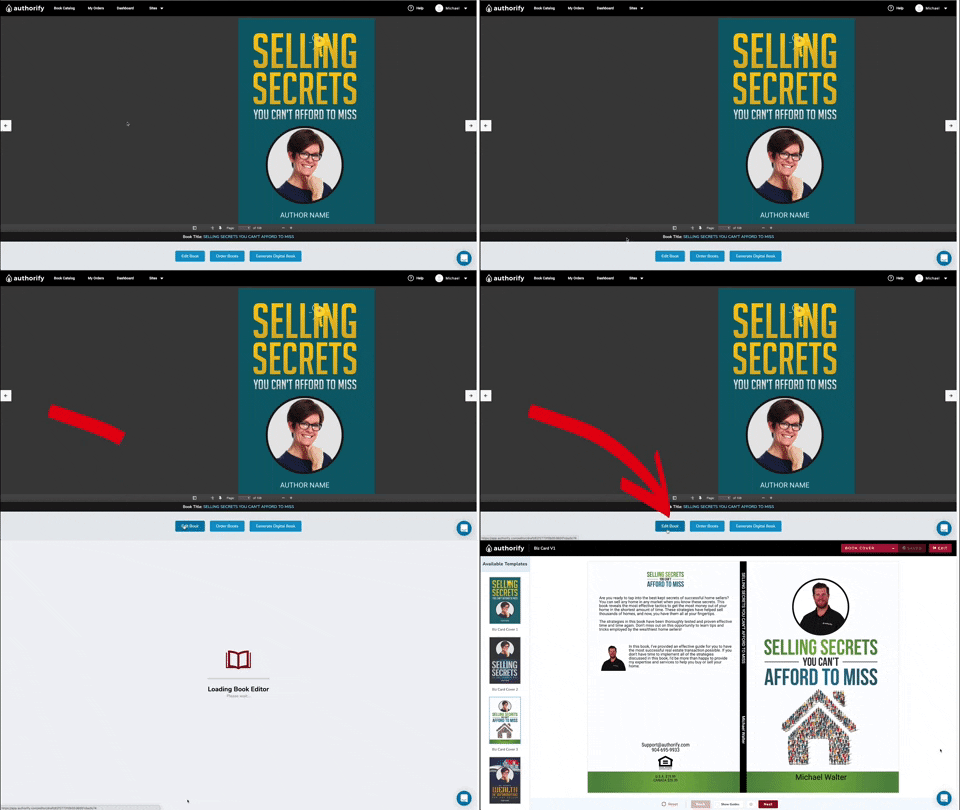
Click the Edit Book Button
Along the bottom of the screen to begin custominzing your book.
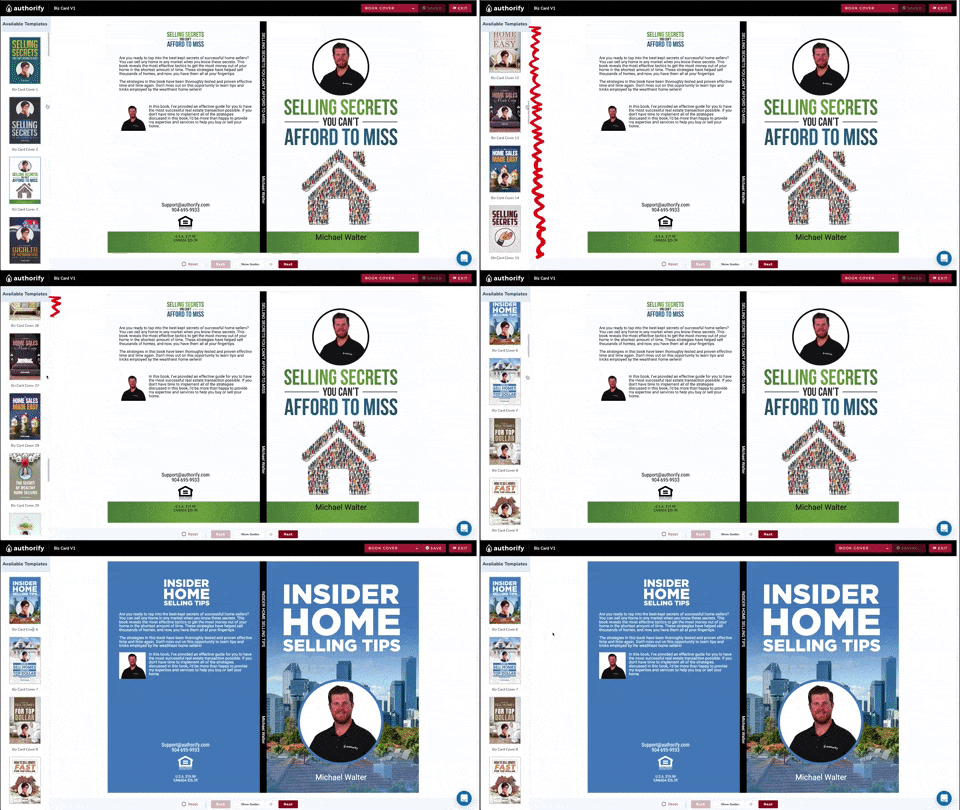
Select the cover you’d like to use for your book.
If you don’t have a high-quality headshot photo, you can always come back and add one later. In this scenario, select a cover without a photo on it.
If you select a cover with an image on it, you can edit it when you upload it.
For example, you can zoom in on your image to get it to fit. You can also click and drag to expand your image to fit the area

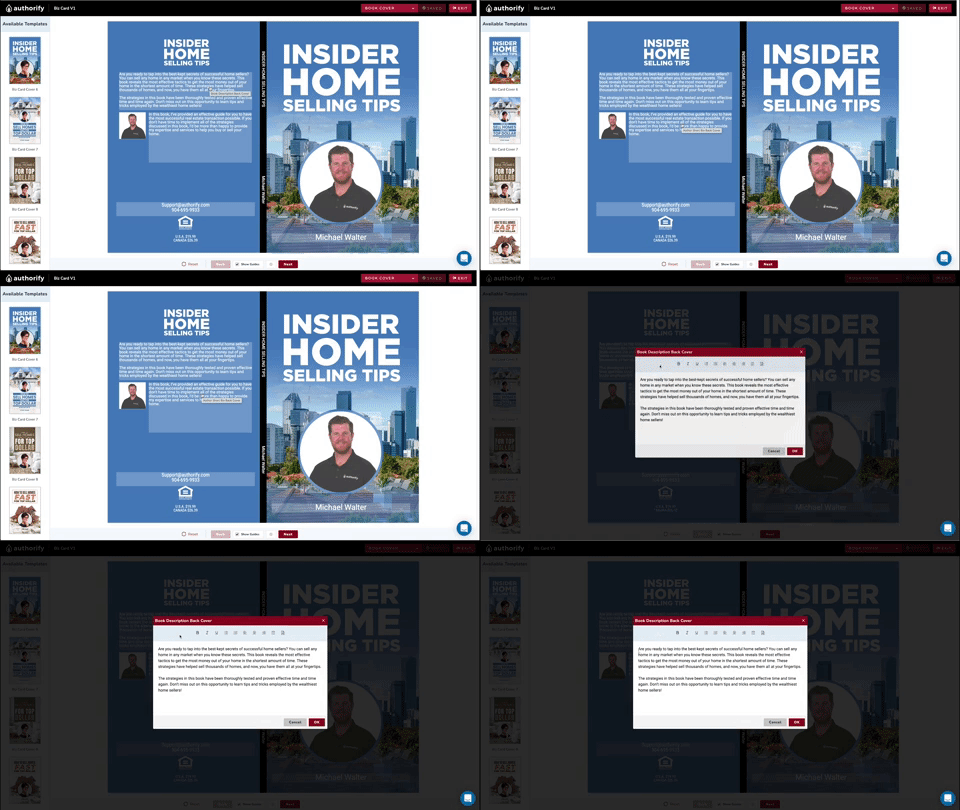
To customize text on your book cover,
click on the area you would like to modify. When you do, a box will pop up to allow you to modify the text. When you are finished modifying the text, click the “done” button.
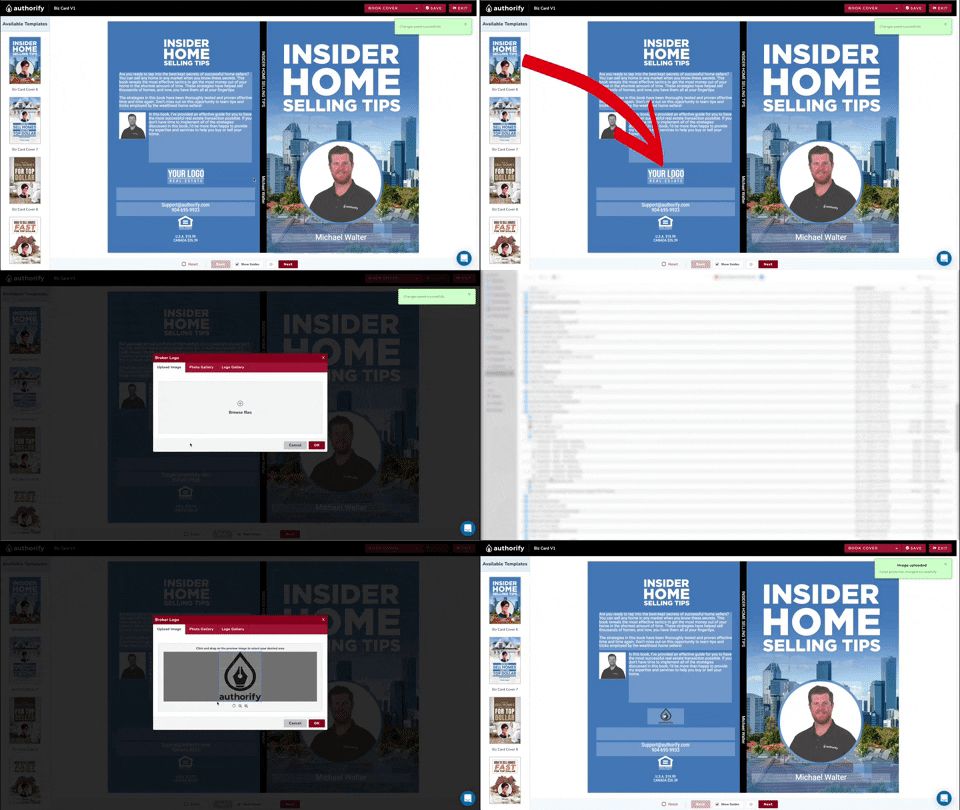
To upload your logo,
click on the “Your Logo Here” placeholder and upload your logo file from your desktop. Just like your headshot image, you can resize the logo image.
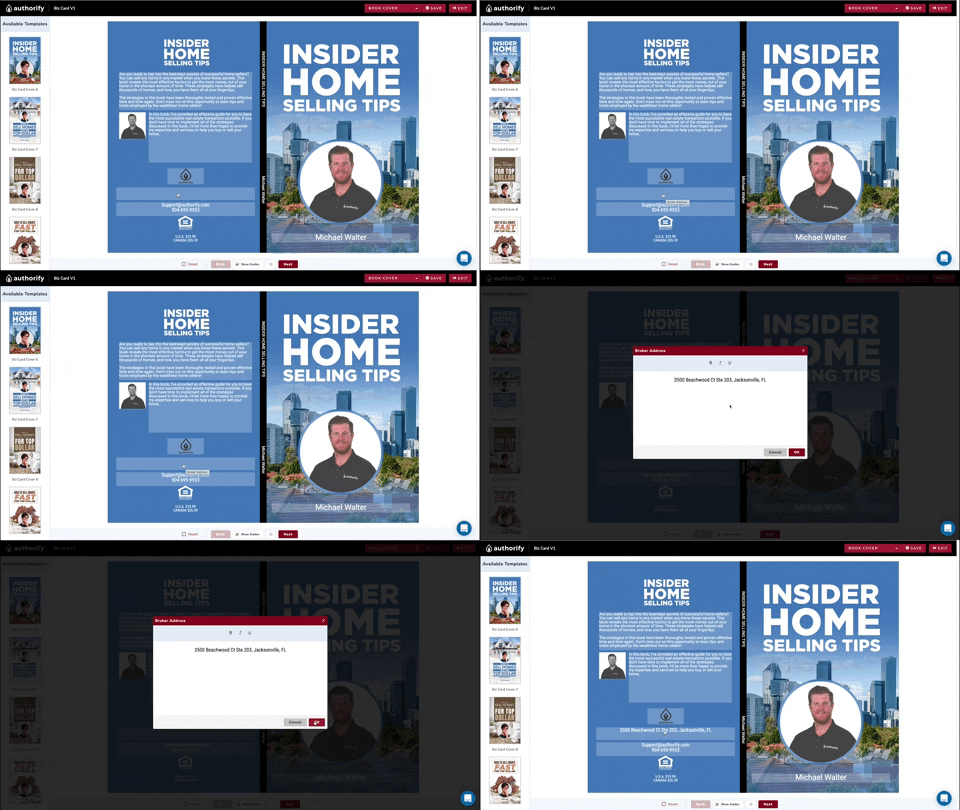
Customize your brokerage and contact information.
Click on the placeholders and enter your brokerage address. The contact information shown on your book by default will be the contact info you used to create your account.
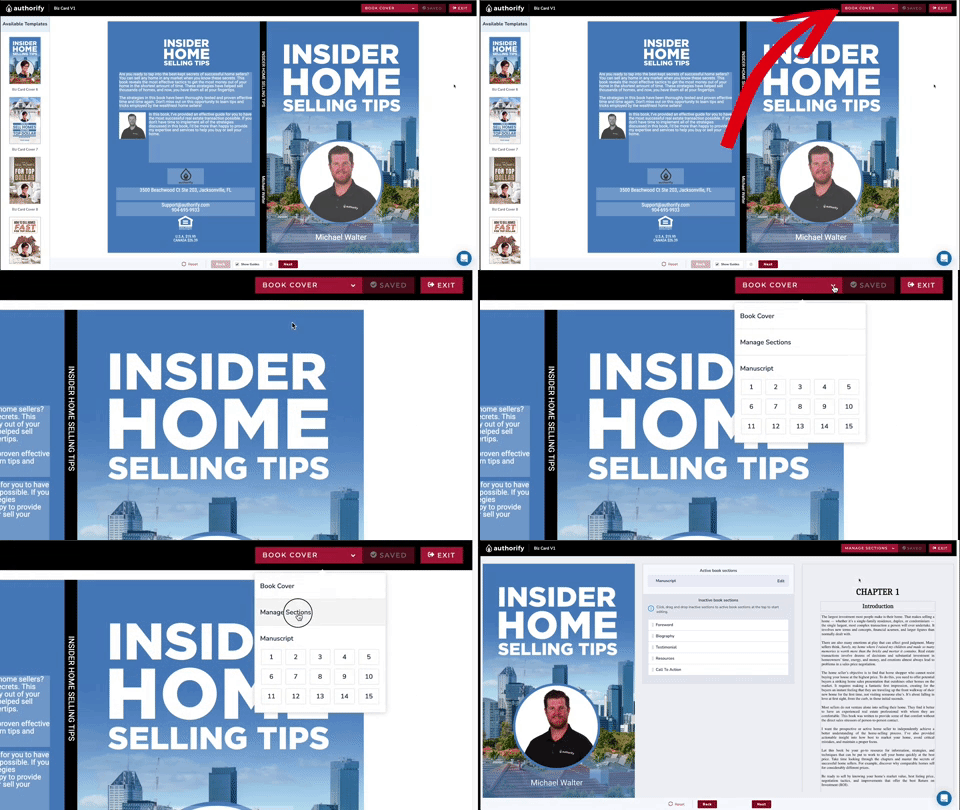
When you are happy with your book cover,
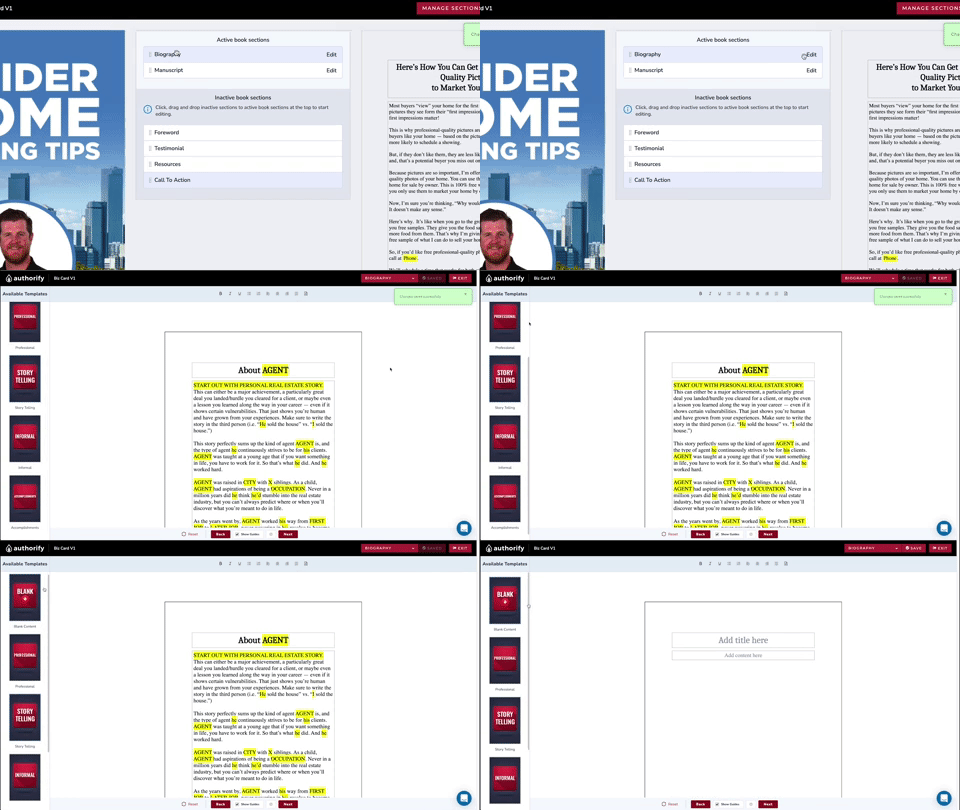
you can move on to customizing the manuscript. Click on the dropdown located along the top right of the screen and select Manage Sections. This will give you access to the interior of your book
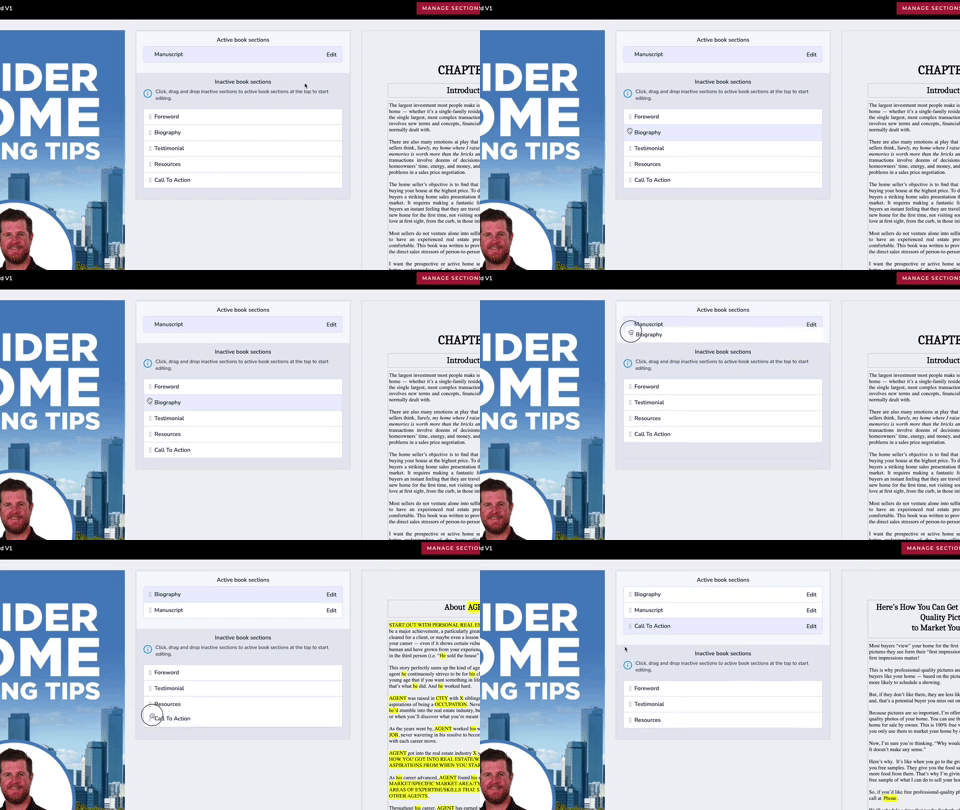
Manage the sections of your book on the next page
The manuscript of your book is the main section of your book that has all of the content.
You can add sections before or after the manuscript to enhance your book.
For example, you can add a biography section before your manuscript that tells readers who you are and gives them more information about you.
Plus, you can add a “call to action” at the end of the book if you would like to make an offer to get people who have your book to contact you and start a sales conversation.
If you want to deactivate a section, just drag it to the inactive book section in the middle of the screen.
You can always drag it back up to the active section if you want to reactivate it.
Plus, you can move sections of your book around by dragging them to the location you would like them to be.
In order to customize a section of the book click on the Edit button of the desired section.
If there is more than one template available for a section, you can see it on the left side of the screen.
There will always be a blank template available so you can create your own version or paste in something you already have written.
For example, for your biography, you can paste in a bio that you already have written or write something right on the blank page.
If you decide you don’t want to include a section of your book later on, you can always go back to the “book section” page and deactivate it.
If there are multiple templates available, you can click on a template and it will populate in the main screen so you can review it.
If you like a pre-populated template, you can modify it.
Any sections that are highlighted in yellow are sections you need to modify.
To modify them, click inside the text and fill in the appropriate information, like your name and phone number.
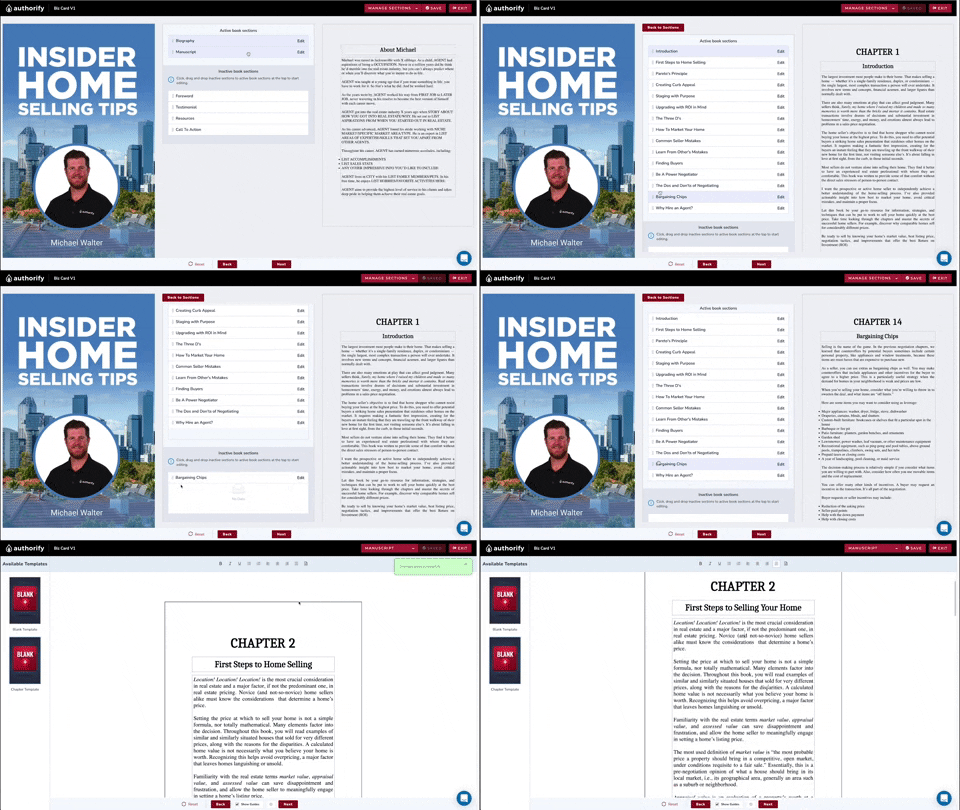
To edit the chapters in your book click on the eidt button next the manuscript.
You have full control of what chapters are active in your book and the order of appearance. Simply drag the desired chapter to move or deactivate it.In order to edit a specific chapter, click the edit button of that chapter. You have full ability to edit the chapter title and chapter content.
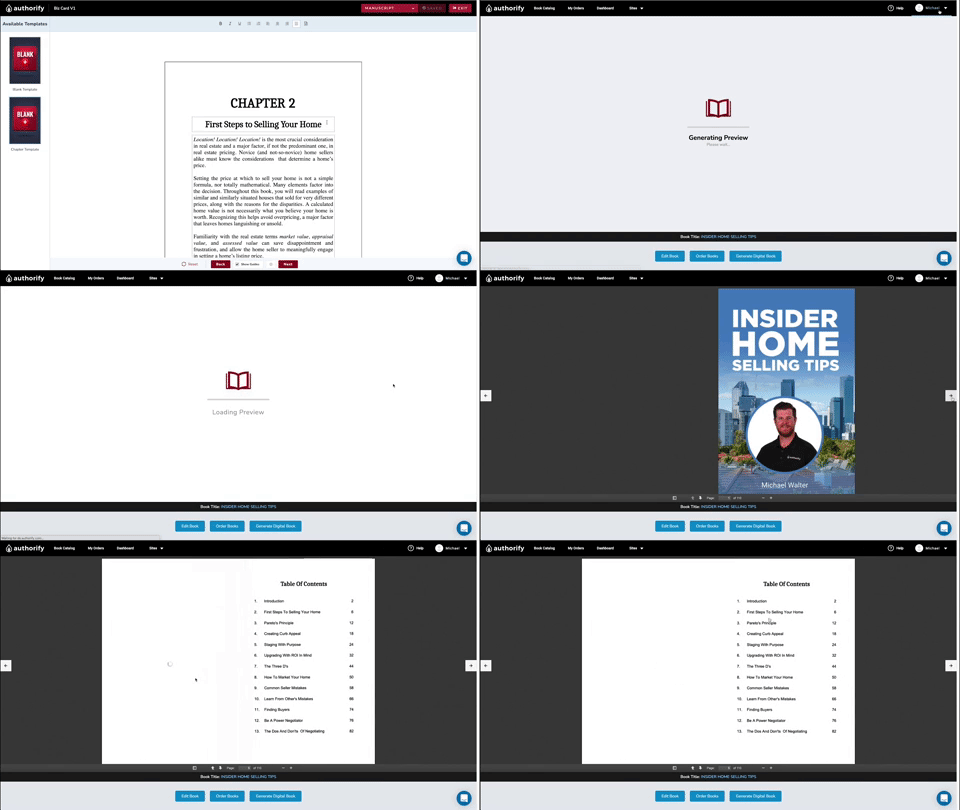
Once you are happy with the edits you have made to your book click the Exit button in the top right corner.
This will load your newly customized book into the book preview window where you are review it.
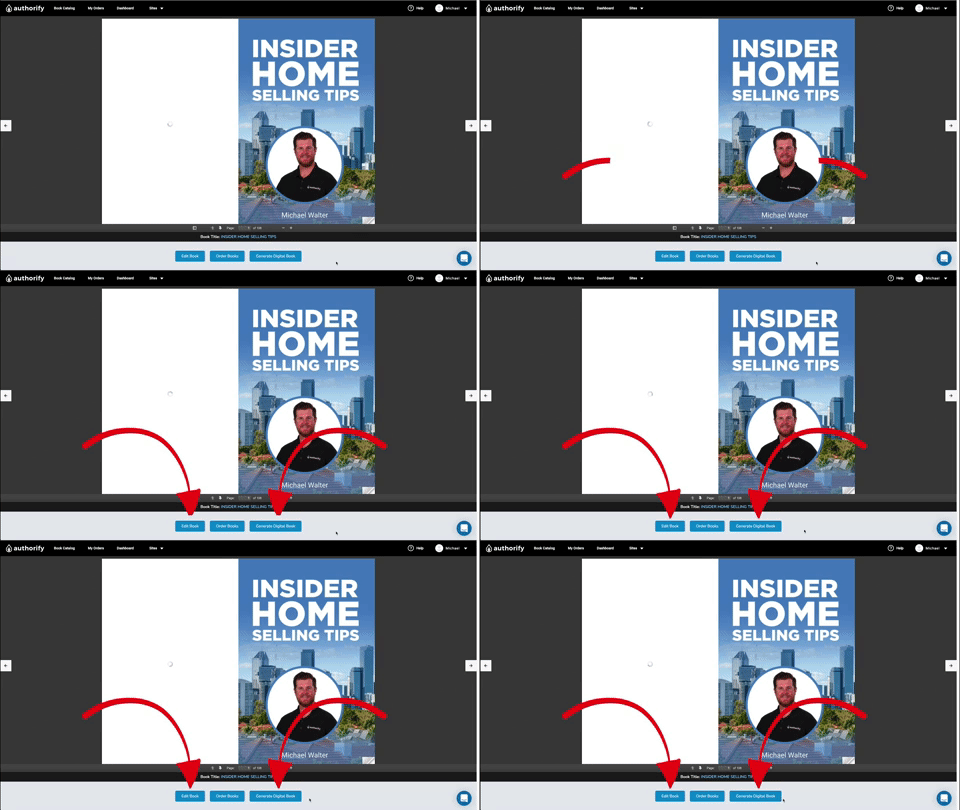
Place an Order for printed copies and Generate Your Digital Links
Now that you have customized your book you are ready to place an Order for printed copies and Generate Your Digital Links. Click the the desired button along the bottom on the screen.
When you click the Generate Digital Links button you will receive both your landing page and digital book link.
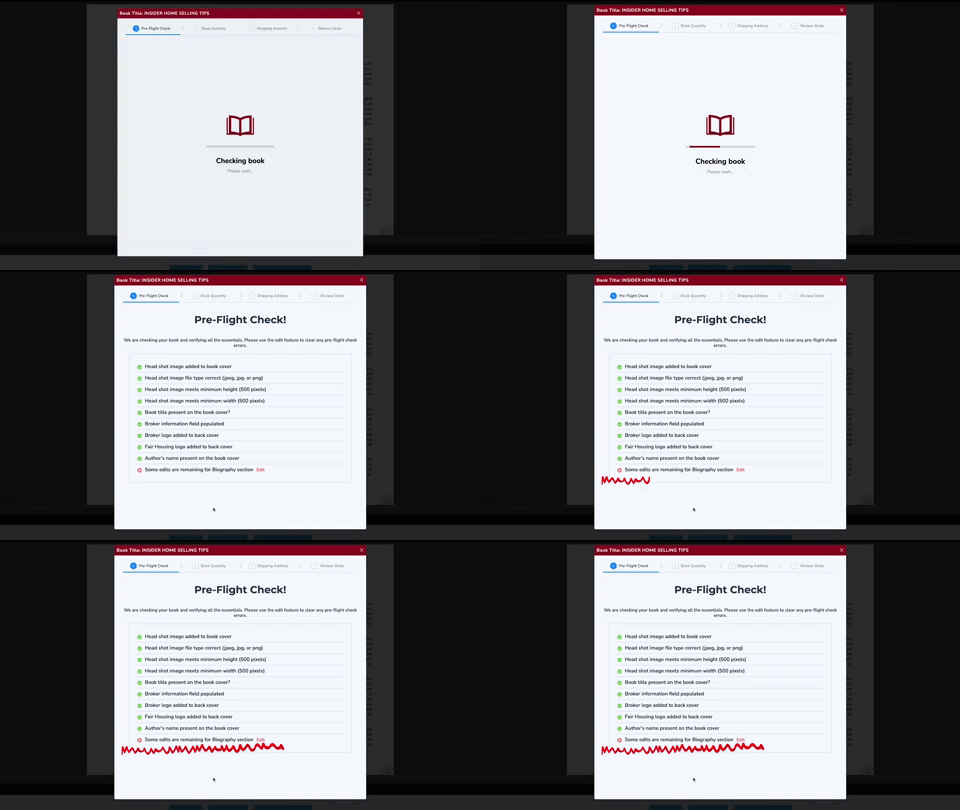
Pre-Flight Check.
Anytime you click on the Order or Generate Digital Links buttons your book will go through the Pre-Flight Check.
This is an automated the system the reviews your book for any potential issues. If there is a problem you will see it displayed on the Pre-Flight Check. If all is good, you will automatically skip to the next step in the process.
Introducing The
Authorify Digital Bundle
Digital Book + Success Training + Lead Capture Site
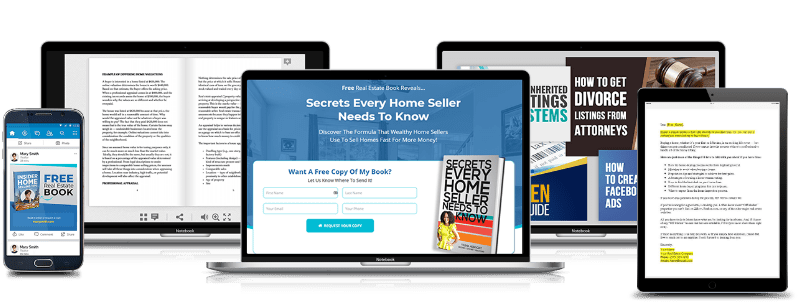
A complete marketing system that allows you to capture leads and convert them into clients with your own personally branded book.
Give your clients something unique that answers their most pressing questions about buying and selling.